Tag Archives: cheese

Double feature from our friends across the pond: British bird and muffins

10 Aug

Well up came that first cool cat,
He said: “Man, look at that!
Man, do you see what I see?
Well I want that middle chick”
“I want that little chick!”
“Hey man, save one chick for me”

Recipe source: Adapted from Elaine Lemm of about.com, original recipes here and here

Lemon Roasted Chicken

When my cooking club decided to have a British theme last month, I’ll admit, I raised an eyebrow. Among the many fond memories of my college semester in Cambridge, food did not feature. I thought about suddenly coming down with mad cow disease, or staying home to mourn the loss of my chances with Prince William and draw mustaches on the flawless Kate. But my friend Mary would have none of this, so I dubiously began looking up recipes.

This simple roast chicken was one I found, and although I don’t know how famously British it is, it sounded like a good opportunity for me to roast a whole chicken for the first time. Yes, embarrassingly enough, this food blogger had never roasted a whole bird.

Happily, I found the experience to be painless. I did modify the recipe slightly, to make it a wee bit more involved, but still brilliant. (I’m really working on all the English English I know, here.) I added carrots and onion into the pan and drastically reduced the amount of butter. Next time, I think I’ll mash some fresh herbs into the butter as well – perhaps rosemary or herbs de provence.

lemon roasted chicken

Jump to recipe, including my modifications, below.
Asparagus & Cheese Muffins

Although the chicken was lovely, it seemed a little pedestrian by itself, so I decided to make these muffins as well. With milk, yogurt, and cheese, if you’re in the mood to support dairy farmers, this is the recipe for you! It calls for Cheshire cheese, a cheese I’ve concluded is impossible to find in San Diego County. Wikipedia describes it as a “soft crumbly texture,” similar to a Wensleydale. But all the Wensleydale I found included fruit or berries, so I opted for an aged Irish white cheddar instead.

Kerrygold aged cheddar

Before folding the asparagus into the batter, the recipe calls for blanching the chopped stems. I love blanching green vegetables for the vibrant color they get, not to mention crispness. Green is my favorite color!

asparagus

The sad part about this recipe is that it makes about 20 muffins, although it is written for 12. The 12 spears of asparagus are enough for the batter, but not for decorating each muffin with a tip in the top. My suggestions for remedying this problem are as follows:

1) skip the decoration and just add the tips to the batter
2) cut tips off additional spears to make up for the recipe’s original sin
3) only give the decorated muffins to special people
4) sculpt eight lifelike asparagus tips from leftover green birthday candles
5) abandon recipe entirely and just eat the cheese

asparagus & cheese muffins

These muffins are pretty easy to make and would be lovely served at a brunch, as savory muffins are unusual and these have a slightly dry, biscuit-like texture. Of course, the muffins and chicken, served with a simple tossed salad on the side, would also make a nice dinner.

Jump to muffin recipe.

RECIPE – Lemon Roasted Chicken

1 3-lb 5oz/ 1.5kg roasting chicken
1/2 stick/55g butter, softened
1 medium lemon, halved
1 bulb garlic, skin on and halved across the bulb
2 carrots, scrubbed and coarsely chopped
1 white onion, coarsely chopped
3.5 fl oz/100ml dry white wine
1/2 pint/200ml chicken or vegetable stock
1 tablespoon cold butter
1 tablespoon all-purpose flour
Kosher salt and pepper, to taste

Heat the oven to 400°F/200°C/Gas 6.

Place the chicken breast side up in a deep roasting tin. Massage the softened butter all over the chicken breasts, legs, sides, and under skin. Season with kosher salt and pepper.

Tuck one half of the lemon and one half of the garlic into the chicken cavity. Squeeze the juice of the second half over the chicken breast, and pop the squeezed lemon into the roasting tin with the second half of the garlic bulb, carrots, and onion.

Place the roasting tin into the oven and cook for 1 hr 30 minutes, or until the internal temperature reaches 170°F. Remove the chicken from the tin and wrap tightly in aluminum foil and leave to rest for 15 minutes.

Place the roasting tin on a medium heat on the stove top and bring the juices up to a gentle simmer. Raise the heat to high and add the white wine. Stir the wine and juices thoroughly and simmer for 5 minutes. Add the chicken or vegetable stock, stir again and simmer until reduced by one third. Mash butter into flour, remove sauce from heat and vigorously whisk in flour-butter mixture to thicken.

Unwrap the chicken and add any juices released by the chicken into the sauce and bring back to the boil. Remove from the heat, and strain into a warmed sauceboat or jug. Serve the chicken immediately with the sauce on the side.

RECIPE – Asparagus & Cheese Muffins

12 spears of asparagus, British when in season
14 oz/400g all-purpose flour (about 2.5 cups)
1 tablespoon baking powder
7 oz/200g Cheshire cheese, cubed
4 oz /125g butter (1/2 cup or 1 stick)
1 small bunch chives, snipped into pieces
2/3 cup/150ml milk
1/2 cup/100ml plain yogurt
1 tsp English mustard
2 eggs
Salt & freshly ground black pepper

Preheat the oven to 400°F/200°C/gas 6. Line a 12-hole muffin tin with paper cases and spray with nonstick coating.

Cut the asparagus stems into small pieces, about 1 cm in length, leaving the tips a little longer and blanch in boiling water for a couple of minutes. Drain and refresh under cold running water, separating the tips from the pieces of stem.

In a large bowl, mix the flour and baking powder with the cheese. Melt the butter and pour into a jug. Add the chives, milk, yogurt, mustard and eggs. Mix well until combined and season generously with salt and pepper.

Gently fold the wet ingredients into the flour & cheese, and stir through the asparagus stems. Be careful not to over mix and stop as soon as the mixture is combined.

Spoon the mixture evenly between the muffin cases and push an asparagus tip into the middle of each.

Bake in the oven from 15-20 minutes until golden. Best eaten hot out of the oven, spread with a little cold butter.

Lunchtime Quinoa Salad

22 Jul

Hey! This is an impromptu post because I was excited about my lunch today, and because I’ve been terrible at blogging lately. As such, I don’t have any pictures to share with you. But I hope this might inspire you with a break in the doldrums that can be packing a work lunch.

eat your veggies!
(Ah, what the heck, here’s a picture I stole from the interwebs.)

What I prepped for myself last night might well be called a “fridge-cleaning salad,” because I used almost entirely ingredients I had leftover from other cooking ventures. Here’s how it went:

quinoa – cooked fresh, since I always keep some on-hand from bulk bins
feta cheese – leftover from frittatas and salads
walnut oil, lemon zest, and black pepper – always on-hand
pine nuts – about 1 tablespoon left in the bag
black olives (sliced, from a can) – leftover from a frittata
cherry tomatoes – bought fresh
carrot – bought fresh
cilantro – bought fresh
red bell pepper – leftover from frittata and a tuna salad
onion – leftover from who-knows-what
jalapeno – leftover from a tuna salad

I have a tendency to get bored with cold, lettuce-based salads, so I really enjoyed using quinoa as a base this time. I nuked the quinoa for about 40 seconds and the veggie-feta mixture for about 10, just to remove the refrigerator chill before combining them. Quinoa is a great source of protein and fiber, as well as gluten-free, so it’s primo vegetarian fuel.

quinoaThis site has even more info about quinoa!

My cooking method is to boil 1 1/4 cups of water, then turn the heat to low and add in 3/4 cups of quinoa. Cover and simmer for 15 minutes. I used about half the quinoa in this batch, and the other half I’ll probably prep for breakfast (another blog to come in the future!).

veggie loveMuch to my delight, this made a yummy, healthy, and very filling salad! And it was good geeky fun to see how much I could throw into it. I’m sure I will be making more salads like this in the future.

If you decide to try this out, I’d love to hear about your concoction in the comments section! 🙂

Easy Breakfast Frittata

23 Jun

The only way to keep your health is to eat what you don’t want, drink what you don’t like, and do what you’d rather not.
-Mark Twain

Recipe Source: Adapted from Stone Soup

French pastries

I went on vacation this month. Two weeks in France. I walked a lot there. I slept very little. And I ate A LOT. Among the few French phrases I know are joie de vivre and bon vivant, and I decided to practice them whole-heartedly. But two weeks of a diet rich in croissant and pastries (have you seen the pastries over there?!!), and a notable lack of fiber, fruit and vegetables takes its toll, so like all good moderates, I am now doing my post-vacation penance.

Help scale

Incidentally, I stumbled upon this article – Your Summer Swimsuit Strategy – on my first day back home. I highly recommend it for a good laugh to combat the imminent beach-body insecurities looming on the horizon.

For the next few weeks, I’ll be practicing a low-carb, low-sugar diet. Low processed foods, really. My thinking on this method has changed somewhat since I followed the South Beach Diet a few years ago, especially with the reduction of animal products in my diet. This time around, I’ll be focusing on vegetables, legumes and nuts, with the occasional egg or cheese product added for protein/flavor, lean meats such as chicken or fish a few times a week, rare splurges of bacon, and fruit reserved for breakfast and dessert.

Low-carb dietI recently came across this simple breakfast idea from Jules at Stone Soup, a frittata that is baked in the oven rather than over the stove. It’s incredibly easy to make and the flavor combinations are endless. She uses a springform pan and four eggs, which makes enough frittata to feed me for almost a week. Sadly, my springform is old and doesn’t spring open anymore (not to mention a bit rusty), but I’ve found that a glass pie dish works just as well.

I like to use 2-3 add-ins, with everything finely diced so that I can eat this easily at my desk with just a fork. This morning’s frittata was made of garlic and shallots, sauteed together for about 5 minutes with a bit of butter; mushrooms and bell pepper I threw in raw; and a handful of parmesan and spices. As you can tell from my ingredient suggestions below, I treat this dish basically like a crustless quiche. I’m not sure if it’s still by definition a frittata with these mix-ins, but it’s my blog and I can do what I want so there.

frittata ingredients

A few fillings you might want to try ~

meats such as ham, bacon, turkey, or sausage
onions, red or yellow, or shallots – raw, sauteed to translucence, or carmelized, or fresh diced scallions
fresh veggies such as tomatoes, spinach, zucchini, summer squash, eggplant, or bell peppers
packaged veggies such as olives or sun-dried tomatoes
cheeses such as feta, parmesan, or pepperjack
herbs and spices such as oregano or herbs de provence

frittata slice

RECIPE – Easy Breakfast Frittata (the basic method)
serves 2

I’m so glad I discovered the trick of baking frittatas in a spring form pan, as opposed to the old school high maintenance frying pan method. So much easier to mix the egg with your flavouring then pop in the oven to bake for 15 minutes while you do other things. My type of dinner.

Feel free to play around with the filling. Tomatoes are lovely, as are different cheeses, canned chickpeas work a treat or fresh asparagus in the spring. So many possibilities.

2 zucchini (courgettes), sliced into rounds
4 eggs
2 handfuls grated parmesan cheese

Preheat oven to 400 degrees F (200C).

Heat a large frying pan (skillet) on a medium heat. Add a little olive oil and cook zucchini, stirring occasionally until they are tender.

Combine eggs and parmesan and season.

Line a 20cm (8in) spring form pan with baking paper and grease the base and sides with butter or oil. Spoon the zucchini in then pour over the egg mixture.

Bake for 15 minutes or until golden and puffy.

Balsamic Rib-Eye Steak With Blue Cheese

14 Feb

My favorite animal is steak.
~Fran Lebowitz

Recipe Source: Food.com

When I think about romantic meals, I always think of steak. I don’t know why that is; maybe I’m a victim of marketing. Or it could be that steak is visceral – it’s rich and hearty, and you have to chew it. About a year ago I started to appreciate the rarer end of preparation, so add to that list bloody. When eating a steak anywhere under medium, there’s no pretense about saving the animals. No, what you’re eating is pink because it used to be alive. It was made of flesh and blood, just like you. And if you’re a mindful person, there’s a sacredness in the act of eating it. Steak is not a meal for dieting, but rather when you need something to savor. If it’s worthwhile it’s also expensive, it’s for pairing with full-bodied red wine and good company, and it’s reserved for special occasions. At least, that’s the attitude toward steak in my house.

So last week as I sensed the holiday approaching, I started digging around for a suitable savory dinner recipe. I wanted steak, and I wanted blue cheese. After years of avoiding the stuff, on an otherwise unremarkable day a few months ago, I grabbed a spoonful at the salad bar – and then another the next day, and the next day, and the next. My love of balsamic vinegar is also somewhat young, so imagine my delight when I found this recipe for steak, blue cheese, and balsamic together!

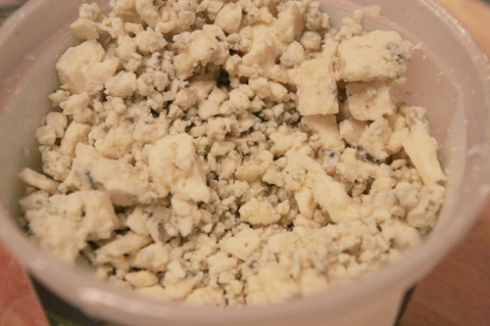
blue cheese crumbles

I knew the meal wouldn’t be a hard sell for David, a self-professed lover of steak and Costco, which happens to sell a fantastic ribeye. As we left the store with bellies full of samples, we just managed to leave the checker behind – although I think he was hoping for an invitation to dinner (“Steak and blue cheese – now that’s some BUSINESS!” said he).

The preparation for this dish is really so simple, it might seem unworthy of Valentine’s Day. But if the day is about being with the one you love, then the less time spent in the kitchen, the better, right?

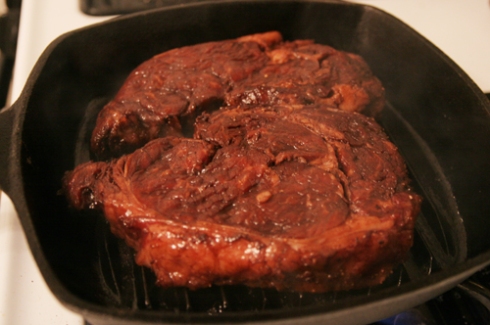
grilling steaks

I really like this cast iron grill pan for indoor grilling. It gives you nice grill marks without ever having to go outside, which is a plus in a snowy climate like San Diego (I kid! Sorry, Midwesterners). Our typical method for cooking steak (ok, I learned it from David), is to sear both sides of the meat when the preheated pan is smoking hot, then finish to ‘desired doneness’ in a 400-degree oven.

The next time I make this, I will make just a few changes: I loved the balsamic marinade, but felt extra in the sauce was unnecessary. Blue cheese, however… yes, I will always take more blue cheese on top. I’d also love some sauteed mushrooms on the steak, which I read from a reviewer on the site but tragically forgot to include.

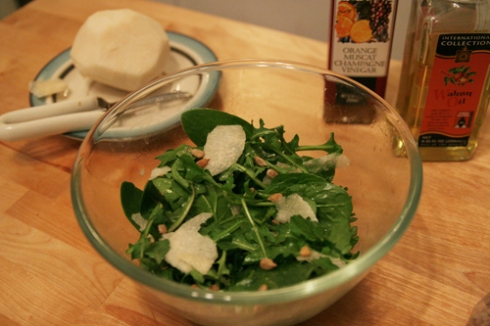
citrusy arugala-jicama salad

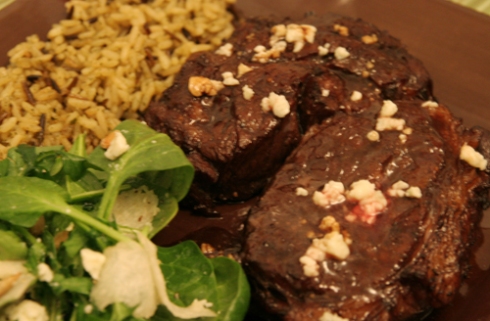
On the side, I wanted something light and refreshing (no potatoes here!), so I tossed together a simple spinach-arugala salad with jicama shavings, sunflower seeds, and a dressing of walnut oil, Trader Joe’s orange champagne muscat vinegar, and black pepper. We also had some leftover rice pilaf from the night before (I know, leftovers, good heavens), so we nuked that up on the side. We drank the cabernet we used for the steak marinade and had a relatively no-fuss, yet scrumptuous, quiet dinner at home – which was just what we needed.

Balsamic Rib-Eye Steak With Bleu Cheese

RECIPE – Balsamic Rib-Eye Steak With Blue Cheese

1 cup balsamic vinegar
1/4 cup red wine (merlot is nice in this)
1 tablespoon fresh ground black pepper
1/2 teaspoon kosher salt
4 rib eye steaks
1/2 cup balsamic vinegar
1/4 cup crumbled blue cheese

Combine first four ingredients in a ziploc bag or shallow pan. Add steaks to marinade, and marinate for 1-2 hours, turning steaks in marinade frequently.

Grill steaks to desire doneness (about 3-5 minutes on each side for medium-rare/medium doneness). While steaks are grilling, combine vinegar and blue cheese to a creamy consistency. Serve sauce as a condiment to steaks.

Roasted Red Pepper & Goat Cheese Sandwich

8 Oct

Recipe Source: Feasts and Fotos blog (recipe adapted from Ina Garten)

Today, friend, I have a most delicious sandwich for you. It’s a little oily, a little slippery, a little messy – it’s not a sandwich to eat over your keyboard or in front of someone you’re hoping to impress. This is a sandwich to be savored. Eat it when you can lick your fingers, pick up all the peppers that have squeezed themselves out of your sandwich, reassemble sandwich, lick fingers, and so on and so forth.

It’s a bit of work to prepare in the front-end, but you can make several peppers at once, and – did I mention it was delicious? – it’s delicious enough to be worth it.

If possible, prep the peppers a day in advance to maximize their flavors. To prep them (4 or 5 at a time), place the peppers whole in a baking sheet with sides and roast in a 475-degree oven for one hour, until charred. Turn once or twice during roasting. Then remove from the oven and cover the peppers with foil in their pan. Leave to sweat and cool, about 30 minutes. When cooled enough to touch, peel the peppers and remove the seeds.

Say no to carcinogens!

I found the easiest way to do this was to keep the stem intact and peel off the skin in as large of sections as possible. Some of the flesh underneath will be black, but you’ll be able to distinguish the inner and outer layers because the outside will be matte. Once you’ve removed all the skin, pull the stem off, turn the pepper inside out, and scrape out the seeds. This is fun if you like slimy things… just in time for Halloween?

peeled peppers

In a medium bowl with lid, mix together olive oil, balsamic, smashed garlic, capers, chopped parsley, chopped basil and some salt & pepper to taste, and mix in the peppers well. Cover and let sit for a day to let the peppers meld together.

marinated red peppers

When you’re ready to assemble the sandwich, spread goat cheese on both sides and top with basil, thinly sliced red onion, and marinated pepper. I really liked this on toasted French bread. And confession, I was out of basil here, so I used spring mix. Still yummy!

roasted red pepper & goat cheese sandwich

RECIPE – Roasted Pepper and Goat Cheese Sandwich

4-5 large red bell peppers
2 tablespoons olive oil
1 teaspoon balsamic vinegar
2-3 cloves garlic, smashed
1 tablespoon capers
1 teaspoon chopped parsley
1 teaspoon chopped basil
5-6 large basil leaves, whole
goat cheese
good bread
red onion, sliced paper thin (optional)

the peppers:
Preheat oven to 475 degrees. Place the whole peppers on a sheet pan and place in the oven for 40-50 minutes, until the skins are wrinkled and charred. Turn once or twice during cooking. Remove from oven and immediately cover tightly with aluminum foil and set aside for at least 30 minutes. You don’t want to burn your little fingers. Once they are cool enough to handle, peel all the skins off each pepper and remove the seeds and stem. Rip the flesh of the peppers into thick strips and put them in a bowl with their juices. To the bowl add the olive oil, balsamic, smashed garlic, capers, chopped parsley, chopped basil and some salt & pepper to taste. Voila, the peppers are done! I like to let this mixture blend for a few hours or even a day before preparing the sandwich, so the smashed garlic has a chance to flavor the peppers and oil. I prefer to add the whole garlic cloves smashed instead of chopping the garlic, eliminating the risk of eating a raw piece of garlic in the sandwich. These peppers will stay in the fridge covered for up to one week (if they last that long).

the sandwich:
Toast bread. Spread each half with goat cheese, and lay as many basil leaves in a single layer as will fit on your bread slice, and thinkly sliced red onion on top of that. Lay the red pepper slices on top of the basil leaves, cover with the other slice of bread and enjoy!