Tag Archives: Italian

Happy World Nutella Day!

5 Feb

Seize the moment.
Remember all those women on the Titanic who waved off the dessert cart.

~Erma Bombeck

Have you ever heard of National Hugging Day? What about No Housework Day? Rubber Duckie Day? Who makes  up these crazy holidays, anyway?

…Happy Mew Year for Cats Day?

And we thought Valentine’s Day was created by Hallmark! Well, here’s a new one for you – World Nutella Day.  It was new to me, at least, until I came across this blog.  [Note: check out these fun hand-printed silkscreen calendars of silly holidays for 2011!]

World Nutella Day

Now, for those of you who know me personally, you can attest that I have a cynical side. I may be a little sarcastic  at times. A wee bit skeptical. Not about this. Friends, this is serious. This is NUTELLA we’re talking  about!

Of course my choice was clear. I had to celebrate this newfound Nutella holiday. As I did a little more digging, I  discovered a whole world of food bloggers paying their respects to the addicting chocolate-and-hazelnut spread.  Some take pictures, some post their own unique  recipe creations, some  discuss Nutella as a cultural phenomenon, and  some write touching odes to  their favorite pantry item.

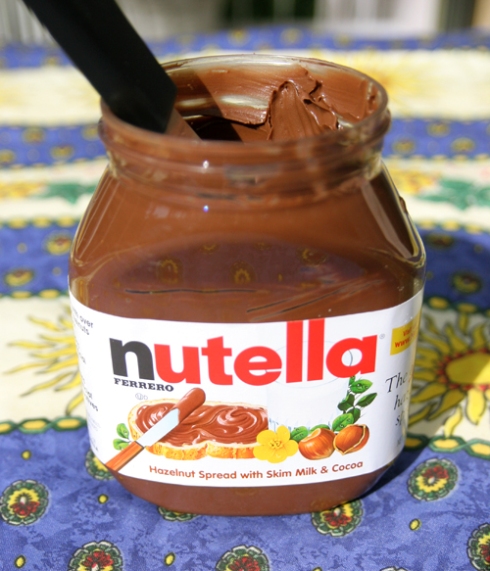
Nutella

So now, without further adieu, here are some recipes I tried out this week!

Nutella and Fresh Ginger Mousse
Recipe Source: Ms. Adventures in Italy

It sounded like a strange combination, Nutella and ginger. It could be a match made in heaven, or a disaster. So I  had to find out which.

When I realized how much of my precious, brand-new 26-oz. Nutella jar would be used by this recipe, I decided to  halve it. Even with doing that, I would still say this pudding serves four, because it’s very rich and a little will go a  long way.

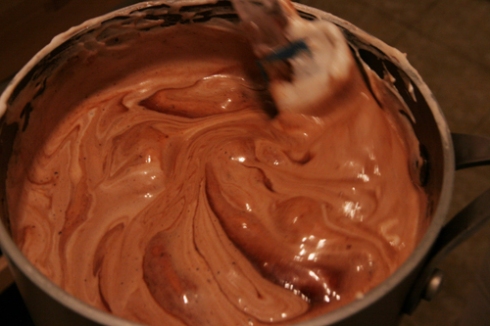
The first step for this mousse is melting Nutella with a bit of water over a double-boiler. Unfortunately, I missed the  double-boiler part of this instruction and overheated my Nutella right from the start. FAIL. (Not pictured due to  panic. But it looks oily when overheated. My advice, use a low heat. See my overly thorough tips on melting chocolate  here.) Once the Nutella and water are  melted and well incorporated, stir in about 1 tablespoon of soft butter and remove from heat. The butter can help if  you, too, have a chocolate-melting nightmare, so take heart!

Off the heat, stir in two eggs yolks, one at a time, then stir in finely minced ginger. I used a microplane grater to  get my ginger soft and paste-like.

The next step is to beat eggwhites and sugar into stiff peaks. This was accomplished beautifully with the help of  an immersion blender (with whisk attachment) and a pinch of cream of tartar. Unfortunately, again, it was done too  early, and the whites began to collapse a bit by the time I folded them into the Nutella mixture. My advice, follow  the recipe steps in order. Mousse is a tricky thing!

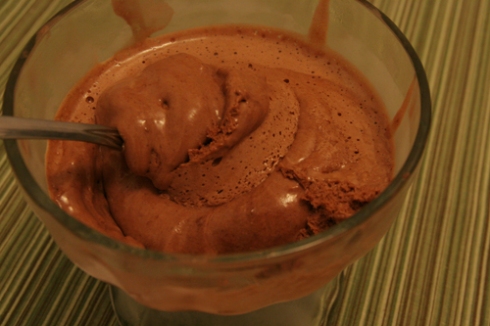
Nutella mousse

Lastly, pour the mousse into serving cups and freeze for two hours or more. If I were to make this a second time, I  think I could perfect the texture. But while I love Nutella and I love ginger, the combination didn’t really do it for me.

Nutella mousse

(Click here to jump to this recipe.)

Nutella-Banana Crepes
Recipe Source: French chef and boyfriend extraordinaire, David

This crepe is a classic, and for a lot of people, their first introduction to both Nutella and crepes. The exciting thing  is, once you’ve mastered the art of making a crepe, the possibilities for filling it are endless!

Much like the pie crust recipe I featured on my pot pie post, this batter has a magical 2:1:1  proportion:

2 eggs
1 cup all-purpose flour
1 cup milk

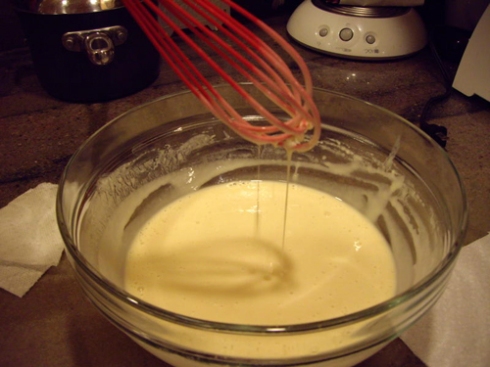
This batter is much like pancake batter, in that you’ll want to whisk it gently to prevent it going flat. Ultimately, it  needs to be smooth, but in this initial mixing, a few lumps are just fine. It’s best to let the batter sit overnight in the  refrigerator, or at least for several hours. The next day, you can gently whisk out any remaining lumps, and add  about 1/4 cup milk to thin it down. Runny is what we’re going for.

crepe batter

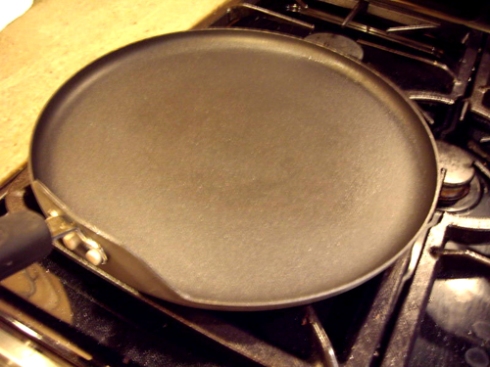
An ideal pan for crepes is round and flat, about 12 inches in diameter, like this one:

crepe pan

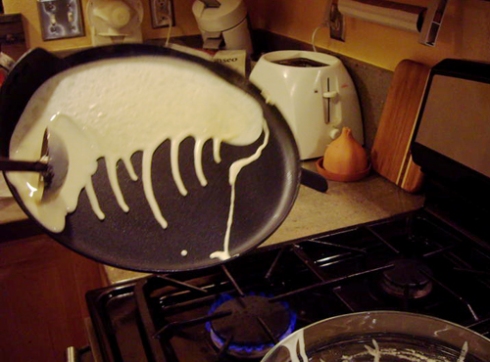
Spray the pan with a light coating on nonstick spray or run a light coating of butter over it, and warm over a  medium heat. Your crepe will cover the entire surface of the pan. To pour it on, ladle the batter onto the top edge of  the pan, tip the pan and let the batter run down the surface. Rotate the pan and repeat this step until you have a  thin coating with no holes. It will take about one or two ladles, depending on the size of your ladle and pan.

pouring crepe batter

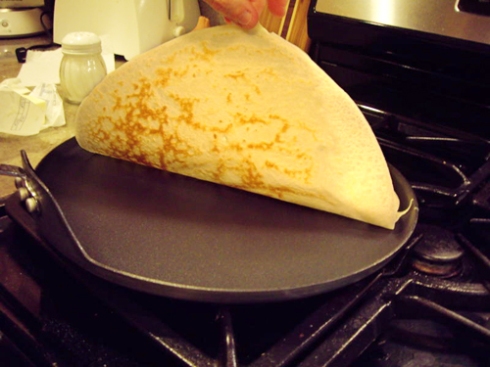
Let the crepe lightly brown on medium heat, about 2-3 minutes…

checking crepe

…then carefully flip it over to lightly brown the other side. While it’s browning, run a stick of butter over the surface  to give it a thin coating, and – this is the really yummy part – sprinkle a thin layer of sugar over that. The sugar  gives the crepe a wonderful, slightly crunchy texture. If you like a simple crepe, you can stop here – butter-sugar  crepe is one classic variety.

But we’re not going to stop there, are we? No… not on World Nutella Day!

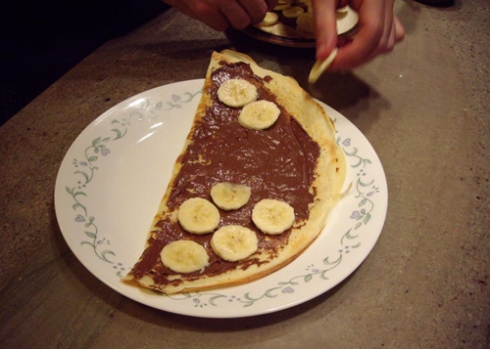
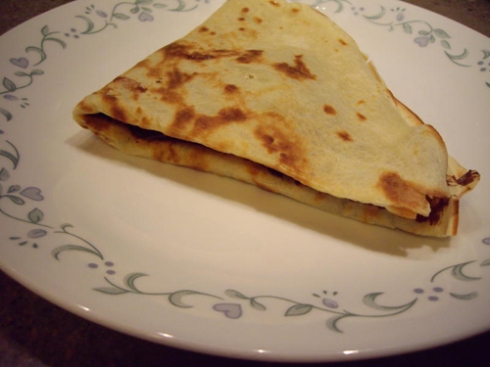
SO. Once both sides are nicely browned, slide the crepe onto a serving dish, and fold it in half (butter and sugar  inside). Quickly, while the crepe is still warm, spread the Nutella over one side – as much as you like! A large,  flexible device is best for this, so you don’t tear the crepe; think pie server or frosting spreader. Place bananas over  the surface and fold in half again. (Strawberries are also a lovely fruit to add to a Nutella crepe.)

Nutella-banana crepe

If you’re eating these with someone you love, or someone you’ve just started dating, I must warn you – the point of  the crepe is the best part. It’s where all the Nutella, sugar and butter are concentrated, and it can make or break  your relationship. It’s best if both parties understand from the get-go: this point is not for sharing. It’s for savoring,  last, after you’ve gotten past the outer flaky edges of crepe and diplomatic, evenly spread middle parts. Whatever  you do, when you make crepes, make two.

Nutella-banana crepe

(Click here to jump to this recipe.)

Chocolate and Chickpea Cupcakes with Nutella-Sour Cream Frosting (gluten-free!)
Recipe Source: Lucullian Delights

If you’ve been cruising this blog for a while, you might have already seen my gluten-free brownie recipe, which is also based on  chickpeas (aka garbanzo beans). Unlike that recipe, this one uses chickpea flour. If you can’t find chickpea flour at  the store, you can make your own by grinding dried chickpeas in a food processor. (I wrote a how-to on the  subject, as I found it to be an interesting experience…)

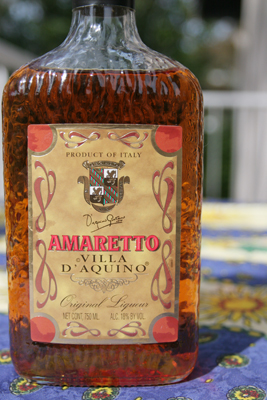
On her blog, Ilva made one plain and one orange version of cupcakes. I wasn’t sure about the orange-Nutella  combo, but I do love cooking with booze, so I opted to use Amaretto. If I’d had Frangelico, that would be even  better.

amaretto

Trader Joe’s carries this brand of Amaretto, and I think it’s great for baking because 1) it’s cheap, and 2) it’s  sweeter than DiSaronno and slightly caramel, so the flavor comes through well in baking. I save the expensive stuff  for after-dinner cordial 😉

I also lightened up this recipe a bit by substituting applesauce for half of the oil, and gave you U.S. measurements  below.

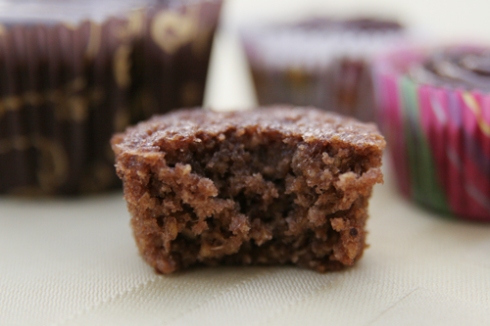
gluten-free chocolate cupcakes

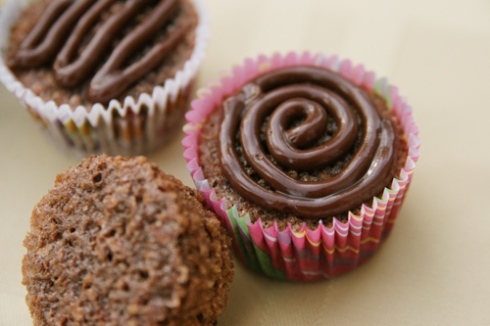
The nice thing I discovered about using chickpea flour, as opposed to canned chickpeas, is that the cupcakes  resemble the more crumbly, cake-like texture achieved with all-purpose flour, than a dense, brownie-like texture.  The method for making this frosting was unique to me, and hands-down the easiest frosting I’ve ever made from scratch! The Nutella really comes through, and it’s just heavenly.

Bottom line: I loved this recipe and will be back for more of Ilva’s chickpea flour creations!

gluten-free chocolate cupcakes w/ nutella frosting

(Click here to jump to this recipe.)

Other quick and easy ways to enjoy Nutella

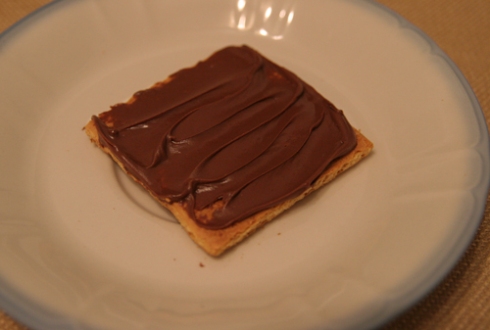
Nutella is delicious on a graham cracker…

Nutella graham

Or, you can try making a how-wide-can-you-open-your-mouth Nutella-graham sandwich:

Nutella graham

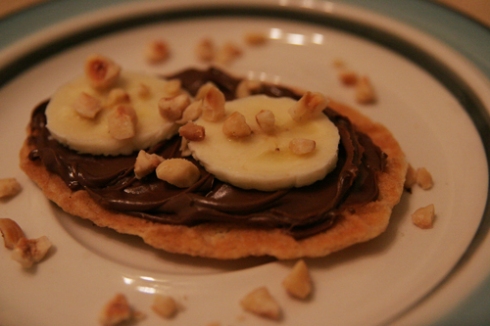
If you’re feeling a bit fancier, try topping a butter or shortbread cookie with Nutella, sliced banana and hazelnuts:

Nutella butter cookie

For health-conscious types, Nutella is delicious on sliced apple or pear. So I hear. Note lack of picture.

You can read more about World Nutella Day and find hundreds of recipes on the official site,  www.nutelladay.com
Also check out the haps on Twitter @nutelladay

RECIPE– Nutella and Fresh Ginger Mousse

125g Nutella
2 eggs, separated
Pinch salt
15g sugar
15g butter, softened
2t. water
1T. fresh ginger, finely chopped or pureed

In a double boiler, melt the Nutella and water until thoroughly melted. Add softened butter and mix thoroughly.  Take off heat.

Separate the eggs while the mixture cools down. After it has cooled down, add one egg yolk at a time to the mix,  incorporating it fully. Add the fresh ginger and mix well.

In a separate bowl, mix the egg whites with 30g of sugar until you have stiff white peaks. Fold the egg whites  slowly into the chocolate mixture. Pour the mousse into glass cups or bowls to set up in the fridge or freezer.

Serves 4.

Ms. Adventures in Italy, adapted from “La classica Mousse” of Sale e Pepe

RECIPE – Nutella-Banana Crepes

2 eggs
1 cup all-purpose flour
1 cup milk, plus more to thin
2 tablespoons butter
2 tablespoons sugar
2 tablespoons Nutella
1 banana

In a medium bowl, beat two whole eggs, then gently stir in 1 cup of flour and 1 cup of milk until well-mixed. Don’t  worry about lumps at this point; you don’t want to overmix. Place the batter in the refrigerator for several hours or  overnight.

Spray a flat, round pan with nonstick spray and warm over medium heat. Thin the crepe batter by slowly adding  milk, until the consistency is runny (around 1/4 cup usually does the trick). Be careful to remove all lumps at this  point.

Hold the pan at an angle and pour on ladle-fulls of batter, letting it run down the pan and become thin. Rotate the  pan and keep ladling and running the batter until the pan is covered. Warm the crepe about 2-3 minutes, checking  the bottom for a medium-brown color. Once the bottom is lightly browned, flip the crepe and brown the other side.

Run a stick of butter along the surface of the crepe to add a thin coating on one side. Sprinkle a thin layer of sugar  over the surface, and slide the crepe onto a serving plate.

Immediately fold the crepe in half, so the butter and sugar are inside. Spread Nutella over the folded surface, cover  with bananas, and fold in half again. Serve warm.

Serves 2, with extra batter leftover

RECIPE – Chocolate and Chickpea Cupcakes with Nutella-Sour Cream Frosting

cupcakes:
3 eggs
3/4 cup sugar
1/4 cup of vegetable, sunflower seed, or canola oil
1/4 cup applesauce
1 cup chickpea flour
4 tablespoons cocoa powder
1 teaspoon baking powder
2-3 tablespoons chopped candied orange peel, optional
2 tablespoons Grand Marnier or other liqueur

frosting:
3/4 cups Nutella
1/2 cup sour cream

Whisk eggs and sugar until fluffy in a bowl. Add the oil and applesauce, and mix well.

Sift chickpea flour, cocoa powder and baking powder into the batter and stir until well incorporated. If you choose  to make the orange version, this is when you add the candied orange peel and the liqueur.

Spoon the batter into cupcake forms and bake in a pre-heated oven (175°C/350°F) for about 10 minutes. but do  check with a toothpick to see if they are ready – they don’t need to be completely dry as they are even nicer if  they are a little on the moist side.

While the cupcakes cool down, whisk sour cream and Nutella until smooth and shiny, then pipe the cream on top  of the cupcakes.

Spaghetti with Artichoke Hearts & Tomatoes

29 Dec

Recipe Source: Pioneer Woman

This recipe defines comfort food for me, and is incredibly easy to make. So easy that the Pioneer Woman admitted to embarrassment for posting it on her blog – but I have no such shame! This is what she calls a “pantry recipe,” meaning that you quite likely already have all or most of its ingredients in your pantry.

The combination of creamy and tart flavors is what I think really makes this dish. To start, you will cook a pound of spaghetti in a pot of slightly oiled, salted water according to package directions.

While you’re waiting for the pasta water to boil, melt butter and olive oil in a large saucepan and saute onion and garlic until they become fragrant, a few minutes. Then add in a can of drained, non-marinated artichoke hearts.

drained artichoke hearts

I like to break them up with my hands a bit to disperse them through the entire dish. Next add in a can of diced tomatoes, with their juice, and simmer for about 10 minutes.

canned tomats

Reduce heat and pour in heavy cream and broth. The original recipe doesn’t call for meat, but if you’d like some chicken, you can add a cooked, diced breast at this point to heat through. In general, I like to use chicken stock when I’m cooking with chicken, and vegetable stock for fully vegetarian, non-meat dishes. I don’t think this is really a “rule” that exists anywhere, but it’s my personal rule as I’ve come to appreciate vegetarian meals more. To season, fresh-grated nutmeg adds a special twist (or dried ground is fine too) in addition to salt and pepper.

parmesan-asiago cheese blend

The last step in this recipe is to douse it with grated parmesan cheese. Surprisingly, on the day I went shopping, a flaky parmesan-and-asiago blend was more affordable, so I used it instead. The blend achieved a gooey-melty-cheesy fabulousness that I don’t remember getting with the grated stuff, so I think I’ll make it a staple in the future. It’s also nice to serve on your side salad.

Just before serving, top with diced chives or another fresh green herb of your choice and enjoy!

Spaghetti with Artichoke Hearts & Tomatoes

RECIPE – Spaghetti with Artichoke Hearts & Tomatoes

2 tablespoons olive oil
2 tablespoons butter
3 cloves garlic, minced
1/2 medium onion, finely diced
1 14.5 ounce can artichoke hearts (non-marinated), drained
1 14.5 ounce can diced tomatoes with juice
1 cup heavy cream
1/2 cup chicken or vegetable broth, more as needed
1/2 teaspoon nutmeg
salt & pepper to taste
1 pound thin spaghetti
1 cup freshly grated Parmesan cheese
2 tablespoons chopped chives or other herbs

Cook spaghetti till al dente. Drain and set aside.

Melt olive oil and butter in a large skillet over medium heat. Add onions and garlic and sauté for 2 to 3 minutes. Add artichoke hearts and tomatoes. Stir and cook for 8 to 10 minutes.

Reduce heat to low. Stir in cream and broth. Add salt and pepper to taste. Sprinkle in nutmeg. Cook over low heat until heated through, then turn off heat.

Place drained pasta in a large bowl. Sprinkle with 1 cup Parmesan. Pour sauce over the top. Add chopped chives. Toss lightly to combine and coat; add a tiny bit of reserved pasta water if sauce seems too thick.

Roasted Red Pepper Pasta

14 Jun

Recipe source: Pioneer Woman

Besides being pasta (an obvious winning quality) and pasta with a cream sauce no less (no-brainer), I was also drawn to this recipe because it meant trying something new: roasting peppers.

I don’t have a grill, so the first time I made this, I roasted the peppers in a small toaster oven. That took about a year. So this time I tried using my cast-iron grill pan, preheated to smoking before I put the peppers on it. It still was a long process… about half an hour long. While I love Pioneer Woman, this is not the first time I’ve found her cooking times WAY off. The next time I do this I will either broil them in my full oven or put the peppers directly on the burner.

That being said, you may have noticed that I never include prep time in the recipes I post. I find them completely useless, because everyone has a different skill level. And on a lot of recipes, they are still flat-out wrong. I think it’s better to just read through a recipe, know thyself, and get a feel for it beforehand. Okay, /diatribe.

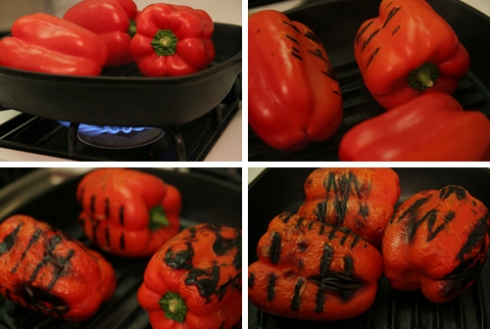
With the addition of some red pepper flakes for kick, this is a pretty yummy recipe. The first step is to char three red bell peppers.

roasted peppers

Once blackened, remove peppers from the flame and place them into a large Ziploc bag to sweat.

sweatin' peppers(Is it bad that this picture makes me think of Laura Palmer?)

Meanwhile, set a large pot of water to boil for pasta. I used farfalle (aka bowtie), Pioneer Woman used orecchiette. Penne would also be good. Toast pine nuts in a skillet, stirring often to prevent burning. Remove from heat when nuts become golden brown and fragrant.

pine nuts(This is probably too dark… I got distracted!)

Then peel the charred skin from peppers and remove seeds. You will note my paper towel… these keep their heat for a while, and despite one cooking teacher’s advice to toughen up my hands to burning (*cough* no names), I am a wimp.

peeling peppers

In a food processor or blender, puree peppers and pine nuts.

food processor

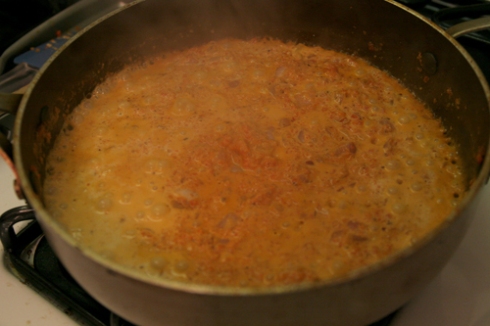
In a medium skillet, heat oil and sautee diced onion and garlic. Puree with peppers and pine nuts, then pour sauce into skillet and add salt and red pepper flakes.

sauce

Heat sauce over medium-high flame and add cream. Reduce sauce slightly and keep warm until pasta is fully cooked.

sauce

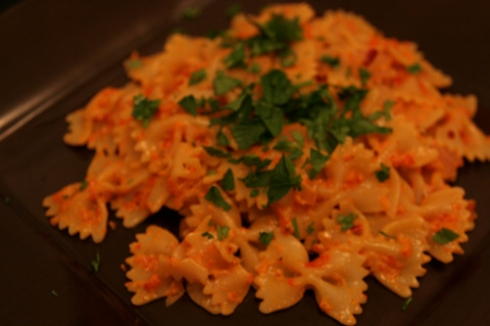
Toss with pasta, top with chopped parsley and Parmesan, and serve.

roasted red pepper pasta

RECIPE – Roasted Red Pepper Pasta

3 whole red bell peppers
2 tablespoons pine nuts
2 tablespoons olive oil
1/2 medium onion, finely diced
2 cloves garlic, minced
1 teaspoon kosher salt
1 teaspoon red pepper flakes
1/2 cup heavy cream
Flat leaf parsley, minced
Fresh Parmesan, shaved or grated
1/2 to 1 pound pasta: Orecchiette, Penne, Fusilli, Etc.

Roast red peppers, and then place in a Ziploc bag to allow to sweat. Peel the charred skins from the peppers, then remove seeds. Set aside.

Lightly toast pine nuts in a skillet. Set aside.

Puree peppers with pine nuts. Set aside.

Cook pasta according to package directions.

In a skillet or pot over medium heat, drizzle in olive oil. Add diced onions and garlic and cook until soft. Pour in pepper puree and stir together. Add salt and red pepper flakes. Pour in cream and stir to combine. Taste and add more salt, if necessary. Add cooked pasta, and then stir together.

Place pasta into a bowl, top with chopped parsley and plenty of shaved Parmesan.

[green] Spinach-Mushroom Ravioli

14 Apr

Today’s chakra is green and governs the heart. For me, this is one of the most important and challenging areas of life to keep in balance. Relationships, love, forgiveness, compassion, self-control and self-acceptance. I think the color green makes sense here – it has always seemed like a soothing color to me. It’s also my favorite color. Guess Mom was on to something when she said eat your green leafy vegetables!

Today’s chakra: Anahata – Un-struck Sound (Heart)
Color: Green: acceptance, nurturing & unconditional love
Location: Along the spine behind the heart
Associated body organs: Hands & arms, heart, thymus gland
Controlled emotions: Love, self-acceptance, social identity, compassion, peace, kindness and equality

[For an explanation of the chakras, see Sunday’s post.]

———————————–

Today’s dish is a nourishing, warm comfort food. Easy to eat, not too crunchy, not too spicy, just yummy. [Semi] homemade spinach-mushroom ravioli ala Giada De Laurentiis.

This isn’t necessarily hard to make, but it is a lot of work, so I always double it and freeze whatever portion I’m not going to eat right away. (The proportions below are already doubled from the original recipe. :))

First, sauté button mushrooms and spinach. Drain if necessary, then process in a food processor. Transfer to a large bowl and mix with parmesan and mascarpone cheese.

spinach mixture

Rather than making pasta from scratch, this recipe uses egg roll wrappers. They’re a bit thinner and lighter than traditional pasta, and very easy to use.

egg roll wrappers

You can make four raviolis with two egg roll wrappers. Brush one sheet with an egg-water mixture, spoon on four portions of filling, and cover with a second sheet. Press to enclose filling, then cut with a fluted ravioli cutter.

ravioli

Cook in batches of three to prevent ravioli from sticking together in the pot. For the sauce, combine two or three varieties of finely chopped mushrooms with either storebought or homemade marinara sauce and warm. Top raviolis with sauce and more fresh-grated parmesan and serve.

1/4 cup plus 4 tablespoons extra-virgin olive oil
12 ounces button mushrooms, sliced
1 teaspoon salt, plus more to taste
1 teaspoon freshly ground black pepper, plus more to taste
2 (10 oz) packages frozen chopped spinach, thawed and squeezed dry
2/3 cup freshly grated Parmesan cheese, plus more for garnish
1/2 cup mascarpone cheese
1/4 cup all-purpose flour (for dusting baking sheet)
12 egg roll wrappers
1 large egg beaten with 1 teaspoon water
1 cup finely chopped assorted mushrooms (such as cremini, button, or stemmed shiitake)
5 cups marinara sauce

In a large sauté pan heat 1/4 cup of oil over a medium-high flame. Add the sliced button mushrooms and sprinkle with 1 teaspoon each of salt and pepper. Sauté until the liquid has evaporated from the mushrooms, about 6 minutes.

Add the spinach and sauté for 2 minutes. Transfer the mixture to the bowl of a food processor. Pulse until a coarse texture forms. Transfer the spinach mixture to a large bowl and stir in 2/3 cup of Parmesan cheese and the mascarpone. Season the filling with more salt and pepper to taste.

Lightly flour a baking sheet. Arrange 6 egg roll wrappers on a cutting board. Brush with the egg and water mixture. Using a tablespoon, spoon 4 mounds of the spinach mixture 1 inch apart on each wrapper, forming 2 mounds on the first row and 2 mounds on the second. Top each with another wrapper and press around the filling to seal the edges. Using a fluted ravioli cutter, cut out the ravioli squares, forming 24 total. Place the ravioli on the prepared baking sheet and cover with a clean towel.

In a large, heavy sauté pan, heat 2 tablespoons of oil over a medium-high flame. Add the chopped assorted mushrooms and sauté until soft and most of the liquid has evaporated, about 8 minutes. Carefully stir in the marinara sauce and simmer for 5 minutes. Season the mushroom sauce with more salt and pepper to taste.

Bring a large pot of salted water to a boil. Add the remaining two tablespoons of oil. Adding 4 ravioli at a time to the boiling salted water, cook the ravioli until tender, about 3 minutes (working in small batches will prevent the ravioli from crowding in the pot and sticking together). Using a slotted spoon, transfer the ravioli to 4 plates. Spoon the mushroom sauce over the ravioli, sprinkle with Parmesan cheese, and serve immediately.

If you freeze uncooked ravioli, to make sure they don’t stick together, line a cookie sheet with either wax paper or plastic wrap, arrange a single layer of ravioli on the sheet, freeze for 15 minutes, and then place them into a resealable plastic bag and store in the freezer. When you are ready to serve, toss the frozen ravioli into boiling salted and oiled water and cook for 3 minutes.

Serves 4.

[red] Spaghetti Bolognese, Strawberry Tarts

11 Apr

Hola! Today starts out ROYGBIV Week with red, which awesomely, is an easy color to find in the vegetable family. Red foods include strawberries, tomatoes, apples, red peppers, pomegranates, radishes, rhubarbs, cherries and raspberries, to name several.

I’m hardly an expert on the chakras, but here’s what I’ve come to understand. The theory comes from Samkhya philosophy, which influenced yoga and tantrism. In it, the human body has several hundred spinning chakras (chakra being the Sanskrit word for “wheel”) positioned throughout. These are part of the ethereal, not physical, body, although they have influence over the physical body. The chakras spin in a circular vortex, absorbing and radiating energy from the surrounding environment. Of the hundreds of chakras, seven have been identified as most important. They are stacked from the base of the spine to the crown of the head, and each is associated with a specific color and sound, as well as physical organs and aspects of the physical, emotional, mental or spiritual life. Chakras have been called lotus flowers, and when a chakra is healthy, the lotus is opened. An imbalance in any area of life can weaken the chakra system. One of the ways to nourish the various chakras is to eat foods associated with their color. A plant’s color is representative of the rays of sun energy that gave it life.

For a deeper explanation and test of your own chakra energy levels, check out ChakraEnergy.com.

Today’s chakra: Muladhara – Root of Tree (Root)
Color: Red: vitality, strength & courage
Location: Base of Spine
Associated body organs: Legs & feet, large intestine, adrenal gland, lymph & blood
Controlled emotions: Physical identity and self-preservation

———————————————————————————

For the first recipe of this week, I decided to go with a classic bolognese sauce. (I don’t think Indians eat beef, but…) I can’t say for sure if I’ve ever actually made one. My end result was a combination of a few different recipes I found online.

My mamma never put red wine in her spaghetti sauce, but when it occurred to me to do it, the choice was a no-brainer.

Two-Buck Chuck!

I also never would have thought to add carrots and celery to this sauce, but since I saw it in a few recipes, I thought what the heck.

Cook the meat and veggies together until the meat is no longer pink. Drain, then add wine, diced tomatoes and tomato paste, herbs and spices, and reduce to desired consistency. Also begin cooking pasta around this step.

Voila!

1 lb lean ground beef
1 cup white onion, diced
1/2 cup celery, diced
1/2 cup carrots, diced
2 cloves garlic, roughly chopped
1 cup dry red wine
1 (28 oz) can diced tomatoes
1 (6 oz) can tomato paste
2 teaspoons dried basil
1 teaspoon dried oregano
1 teaspoon fennel seed
sea salt and black pepper, to taste
grated parmesan to sprinkle on top

For dessert, I decided to make strawberry tarts, because we went to San Diego Desserts recently and got a tart that was to-die-for. What I ended up making was a modification of Ina Garten’s recipe; modification because I didn’t have time to make the tart shells from scratch, don’t own any kind of tart pan even if I’d had the time, and then couldn’t find frozen tart shells at the store. (Good grief, Charlie Brown!) So I bought frozen puff pastry shells instead. Was still delish. I like puff pastry. 🙂

The recipe for the shell is below. But if you decide to use puff pastry shells, preheat the oven to 400 degrees F, then bake them for 20-25 minutes. They will go from looking like this

womp, womp

to this!

Magic!

Scoop out the “tops” out and let them cool.

For the pastry cream, I didn’t have cognac, so I substituted brandy instead. Unfortunately, step-by-step pictures of this process are conspicuously missing from this blog because I was napping while David did this part. But I can tell you that Ina Garten’s instructions are VERY good. Be sure to look at the link for scalded milk too, because we had no idea what that meant.

The pastry cream is a long process, but really does come out exactly like the Contessa says. The pre-whisking “curdling” part happens extremely fast – the cream went from liquid to chunking in “two seconds,” apparently, so just stick patiently with the stirring. Here’s the end result:

Beautimous

Cover the cream with plastic wrap placed directly on the cream and refrigerate until cold. Then scoop into shell and top with strawberries. Final product:

That's MRS. Tart to you!

Tart Shell
1 1/4 cups all-purpose flour
3 tablespoons sugar
1/2 teaspoon kosher salt
6 tablespoons (3/4 stick) cold unsalted butter, diced
2 tablespoons cold shortening (recommended: Crisco)
1/4 cup ice water
2 cups Pastry Cream, recipe follows
2 pints whole strawberries, hulled and halved
1/3 cup apricot jelly
3 tablespoons shelled pistachios, halved, optional

TO MAKE TART SHELLS – Combine the flour, sugar, and salt in a small bowl and place in the freezer for 30 minutes. Put the flour mixture in the bowl of a food processor fitted with a steel blade. Add the butter and shortening and pulse about 10 times, or until the butter is in the size of peas. Add the ice water and process until the dough comes together. Dump on a well-floured board and form into a disk. Wrap in plastic and chill for at least 30 minutes.

Meanwhile, preheat the oven to 375 degrees F.

Roll out the dough and fit into four (4 1/2-inch) tart pans with removable sides, or one 9-inch tart pan. Don’t stretch the dough when placing it in the pans or it will shrink during baking. Cut off the excess by rolling the pin across the top of each pan. Line the tart shells with a piece of buttered aluminum foil, butter side down, and fill them with dried beans or rice. Bake for 10 minutes. Remove the beans and foil, prick the bottom of the shells all over with a fork, and bake for another 15 to 20 minutes until lightly browned. Set aside to cool.

Pastry Cream
5 extra-large egg yolks, room temp.
3/4 cup sugar
3 tablespoons cornstarch
1 1/2 cups scalded milk
1/2 teaspoon pure vanilla extract
1 teaspoon cognac
1 tablespoon unsalted butter
1 tablespoon heavy cream

TO MAKE PASTRY CREAM – In the bowl of an electric mixer fitted with the paddle attachment, beat the egg yolks and sugar on medium-high speed for 4 minutes, or until very thick. Reduce to low speed, and add the cornstarch.

With the mixer still on low, slowly pour the hot milk into the egg mixture. Pour the mixture into a medium saucepan and cook over low heat, stirring constantly with a wooden spoon, until the mixture thickens, 5 to 7 minutes. Don’t be alarmed when the custard comes to a boil and appears to curdle; switch to a whisk and beat vigorously. Cook, whisking constantly, for another 2 minutes; the custard will come together and become very thick, like pudding. Stir in the vanilla, cognac, butter, and heavy cream. Pour the custard through a sieve into a bowl. Place plastic wrap directly on the custard and refrigerate until cold. Yield: 2 cups

ASSEMBLE – Before serving, fill the tart shells with the pastry cream. Arrange the berries decoratively on top of the cream. Melt the apricot jelly with 1 teaspoon of water and brush the top of the tarts. Sprinkle with pistachios, if using, and serve.